My knit journey with Chunky Monkey is going well – it’s so cuddly in my hands! It seems I am a tight knitter and a far more relaxed crocheter - weird but there you have it. A tight gauge suits a hard-wearing item like a hat though so it’s all good.
Between knit sessions on my hat, I am using the gauge to calculate out requirements for a good range of head sizes. My design idea is fairly simple and is unisex to suit anyone really - toddlers, kids, teens and adults so I figure I will write the pattern for a range of head circumferences. I am making this hat for my older sister - she loooooves pinks!
Scheepjes Chunky Monkey is an Aran weight yarn that is 100% premium acrylic. Loving these berry-luscious colours: 2009 Mulberry and 1061 Cerise and I like how it’s working up. Since knitting needles have a pointy tip as opposed to the blunted head of a crochet hook, I find you do have to be a bit careful working the yarn. These monkeys are gymnasts and can do the splits…. But worth the extra little bit of attention that requires – the sheen is lovely, the fabric squishy and the stitch definition is awesome! The firm gauge of my stitches probably enhances this too.
Now that the ribbed brim is done, I can tell you that despite being acrylic the ribbing is still elastic which is important for a beanie. Not super elastic-band kind of springy but we can’t all be merino, right!? It feels a bit snug on my head, but my sister is smaller than me by a few cm so I think we are okay. A smidge of negative ease for each size will enhance the security of the ribbing when worn, so that is important when I calculate the stitch counts for each size of the pattern.

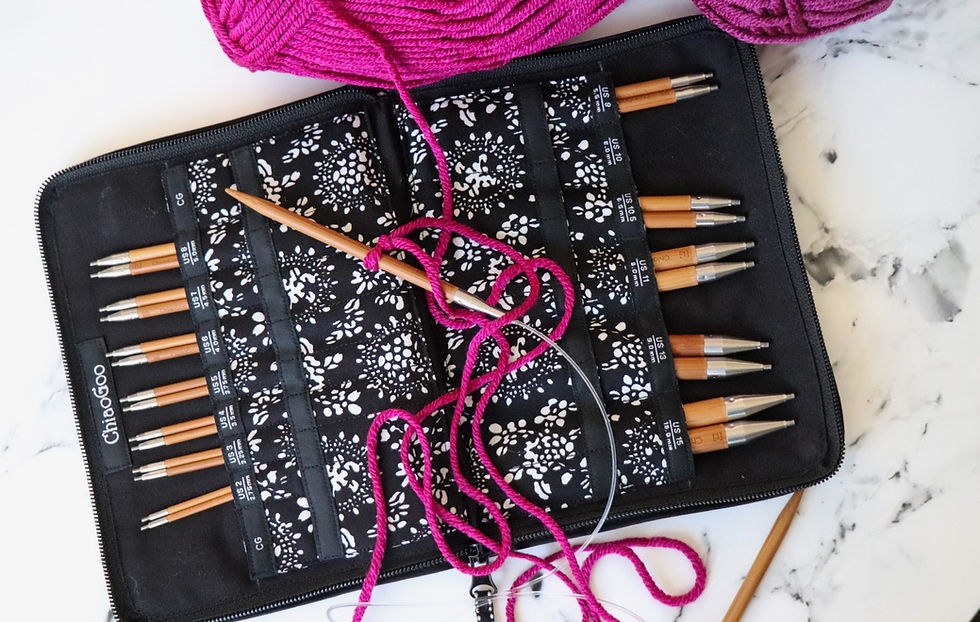
This project was to play with Chunky Monkey, but also explore using these Chia Goo bamboo spin needles - and they are really good. Like, really! The screw tips are very secure – hasn’t loosened at all. This was the biggest reservation I had about screw attachments and it isn’t a problem. The interchangeable set includes keys to tighten the screw attachments when you connect the needles to the cable, and I used them of course – following the manufacturer instructions. (It contains a little pamphlet to describe all the parts in the set.)
The spin cables do really spin and are a lot softer than those of the addi olivewood interchangeable set I used to knit a sweater recently. I am not sure that I can say they are entirely memory free as they have a bit of spring to them, but they sure were a lot easier to control straight out of the box than the addi cables that had been after being softened in hot water and many hours of use, so that is saying something! It made working with the magic loop a LOT more pleasant for this project compared to the sleeves of the sweater I just finished.
This photo shows the magic loop in action – well actually at rest between rounds. The stitch count is split into approximate halves by the folded cable (which "magically" loops out the side - this is my guess for why the name). That little yellow stitch marker indicates the beginning of the round (I tend to place it after the first stitch of the round so it doesn’t slide off between rounds). To work the next round, the idea is to slide the top half of the stitch count on to the top needle and pull the other needle (the one at the bottom) through so the cable can fold out both sides of the project and you can knit from the top needle to the bottom needle across the top half of the stitch count, then loop out the other side to slide the stitches around the needles and you can do the same to the bottom half to complete a round.
The cable length (needle tip to needle tip) needs to be much longer (2-3 times) the circumference of the project so the cable can loop out both sides of the project as you knit from one needle to the other like you can see in the photo below (the folded cable on the right is a little hard to see against this white surface sorry about that).
All the sliding of stitches over the needle and cables is an absolute breeze with these super smooth connection points. I am really impressed by this!! Again, easier to use and super slick compared to the addi interchangeables I used for my sweater. VERY happy!
It won't be long before I finish my sister's beanie, pull the pattern together and show you some finished pics.
Chunkey Monkey is available from Scheepjes retailers worldwide, and via these affiliates if the mood takes you*:
Wool Warehouse (in the UK - ships worldwide)
Caros Atelier (The Netherlands)
I will be finished soon and post again to show you the finished hat!
See you then,
Susan (Peppergoose)

#peppergoosedesign #scheepjes #peppergoosehandmade #chunkymonkey #aranyarn #freepatterncoming #knitting #knitexperiment #chiagoo #debondt #australiandesigner #maker #handmadeisbest #yarntherapy #cerise #mulberry #beaniepattern
*This post contains affiliate links. If you purchase yarn through these links I receive a small percentage of the sale but it does not cost you any extra.
** Yarn support provided by Scheepjes
%20final_edited_edited.png)


I find I am tighter using needles and looser using circular and DPN's. It's a trial. LOL